Thursday, July 5, 2007

Lens Contrast (Part 1)


_DSC4781, originally uploaded by shutterhack.
Taken with a Nikon D50 and AF Zoom-Nikkor 70-300mm f/4-5.6G lens

Many photographers — even some experienced and knowledgeable ones — seem permanently confused about contrast, especially when the word is used to describe lenses. In photography, like the word "speed" (which can refer to the maximum aperture of a lens, the size of the gap in a constant-rate shutter, or the sensitivity of an emulsion), the word "contrast" actually refers to several different things. "Contrast" in photo paper, for instance, or in a finished image, refers to overall (sometimes called "global") contrast, meaning how the materials distribute tonal gradation from black to white or lightest to darkest.

When we talk about lens contrast, we are not talking about that quality. What we are talking about is the ability of the lens to differentiate between smaller and smaller details of more and more nearly similar tonal value. This is also referred to as "microcontrast." The better contrast a lens has (and this has nothing to do with the light­dark range or distribution of tones in the final print or slide) means its ability to take two small areas of slightly different luminance and distinguish the boundary of one from the other.

Labels: , ,

Restricted amount of light


_DSC4860, originally uploaded by shutterhack.
Taken with a Nikon D50 and AF Zoom-Nikkor 70-300mm f/4-5.6G lens

ISO stands for 'International Organization for Standardization' and their film speed ratings are used to indicate the relative amount of light necessary to give a proper exposure. A normal film will be rated at ISO 100. A film rated at ISO 200 will give a proper exposure with only half the amount of light compared to the ISO 100 film, enabling you to shoot in lower light or with a smaller aperture or faster shutter speed. The ISO 200 film would be referred to as a 'faster' film. There are films available that range in speed from ISO 25 to ISO 1600.

So why not use the faster films all the time, what are the advantages of slower films?

The faster films have a more prominent grain structure the individual grains clump together to form spots that are visible to the naked eye, especially when you blow the photo up to A4 or larger from a 35mm negative. In certain circumstances this effect can be used creatively especially in black and white photography but mostly it is undesirable.

How does all this effect digital cameras?

In the digital photography world the phenomenon is called 'noise' not 'grain', the cause of the problem is slightly different. When light levels are low, the sensor has trouble reading the scene properly and pixels of random colour are thrown into the picture. However to us photographers the end result is the same or very similar.

The 'better' digital cameras have, usually hidden away among the manual settings, a sort of simulation of the film speed effect. My camera for instance, the Nikon D50, has an ISO range from 200 to 1600. This feature is not available when you are in fully auto mode but is available in all the other modes. I sometimes keep it set to ISO 400 as the grain structure is not significantly worse than ISO 200 and it gives me that extra f-stop to play with. When I am shooting fast action and I want to freeze the action (not always the case - see shutter speeds and apertures) then I'll select ISO 400 or 800. If the light is very bad ie night time or indoors then a shot at ISO 1600 is often better than a blurred shot caused by using too slow a shutter speed or no shot at all.

Labels: , ,

High ISO is better than underexposure


_DSC4086, originally uploaded by shutterhack.

Taken with a Nikon D50 and AF Zoom-Nikkor 70-300mm f/4-5.6G lens

In general dSLR imaging sensors have about 1/10th of a stop latitutde for overexposure but a bit more for underexposure, depending on your skills at image processing.

You can easily check this yourself on your own camera with a well chosen subject and bracketed exposures. You may find that for your uses there is more or less than 1/10th latittude at the bright end. Hence the rule that dSLRs should be used like slide film: expose for the highlights. There are some plug-ins that claim to be able to retrieve data from mildly blown highlights by using algorithms to derive detail from the color information that may not have clipped, e.g. the green channel. This is analagous to Kodak's recent announced modification of the Beyer filter. This can only be done with raw data.

Particularly for amateur uses, shooting raw, reasonable quality images can generally be brought up from areas that are as much as 1 stop underexposed. This is why raw is the most flexible way to use a dSLR: you don't really increase the limited latitude of the sensor but you can create the appearance of an image that has greater latitude than in-camera jpeg processing can achieve.

Obviously there are noisy and less noisy ways to bring up the detail from underexposed areas.Ultimately you have to understand the limits of your gear and software in your hands (not what you read in a magazine or in sources of misinformation), sort of a modified Zone approach, so that you don't spend too much time fiddling in Photoshop trying to bring back the dead.

Labels: , ,

Is photography like opium for the masses?


_DSC4859, originally uploaded by shutterhack.
Taken with a Nikon D50 and AF Zoom-Nikkor 70-300mm f/4-5.6G lens

Photography is, at its core, a democratic medium. This is not something to be feared, it is something to be celebrated. Photography has always enabled people to record what is important to them, at the time, unlike the arts that preceded photography. It is, for most people, about the moment. It hasn't been otherwise since the days when a photographer had to be a chemist and own a mule for carrying equipment.

Labels: , , ,

Panning with a slow shutter speed


_DSC4760, originally uploaded by shutterhack.
Taken with a Nikon D50 and AF Zoom-Nikkor 70-300mm f/4-5.6G lens

The shorter the time that the shutter is open the sharper the photo will be.

Panning with a slow shutter speed blurs the background. If you are photographing fast moving objects such as cars or people running you need to select fast shutter speeds to capture the sharpest picture you can. One exception to this is when you are panning the camera with the subject, the object of the exercise here is to render the subject sharply and blur the background, so a careful selection of the right shutter speed to do both is necessary. I often find that a little blur in the right places on a picture gives a greater sense of movement than if everything is pin sharp.

This blur, however, must be in the right places, normally we want to see the head and torso rendered sharply but, if the feet and hands are blurred, it can often be a good thing. Blurring the background can also get you out of trouble when there is a lot of clutter that will detract from the main subject. Getting the shutter speed right to render the correct balance of sharpness and blur on any given subject can really only be determined through trial and error.

One of the great advantages of the digital camera with it's instant playback is that this learning process can be a lot shorter than it was before. If you have a zoom facility on your playback of pictures, now is the time to get familiar with it. I had my digital camera for quite a while before I realised that I could review my pictures and zoom in to check the sharpness.

Not only moving objects suffer from too slow a shutter speed. If you are holding the camera in your hand rather than having it mounted on a tripod, you will see the telltale signs of 'camera shake' (i.e. the movement of the camera) at shutter speeds longer than 1/125th of a second. A secure pair of hands will be able to get away with 1/60th or even 1/30th of a second but the camera would be better mounted on a tripod.

Once again I will say at this point that the difference between a mistake and an effect is usually the degree. A small amount of blur would be considered a mistake, whereas really blurred streaks of light can be an interesting effect. It's all a question of convincing the viewer that you intended to do it.

Labels: , , ,

Lens Contrast (Part 2)


_DSC4480, originally uploaded by shutterhack.

Taken with a Nikon D50 and AF Zoom-Nikkor 70-300mm f/4-5.6G lens

You can have a lens of very low contrast that can be made to transmit the same overall range of light to dark or white to black as one with high contrast. It will just show much less micro detail in the scene, and look relatively muddy and lifeless. Some pictorialist-era pictures actually have a full range of tones from white to black but show (by design) exceptionally low degrees of what we would call lens contrast. Low lens contrast is also created when you put a "softening" filter on a lens you can still print the picture with an overall contrast from pure white to maximum black, but the microcontrast will be severely curtailed.

Savants talk about resolution and contrast being the same thing. Ultimately, they do go hand-in-hand, because you can't distinguish contrast without resolution and you can't distinguish resolution without contrast. But this is for very fine detail, in the range of 30-40 lp/mm or even greater frequencies ("frequency" in this sense refers to the spacing of the equal black and white lines used to determine lp/mm and MTF), which the eye generally canþt see in prints and slides (although Ctein thinks we "sense" it in terms of a subjective sense of richness in gradation).

Labels: , , ,

Better to increase the ISO


_DSC4085, originally uploaded by shutterhack.

Taken with a Nikon D50 and AF Zoom-Nikkor 70-300mm f/4-5.6G lens

It is better to increase the ISO setting rather then underexposing. Better yet it to go ahead and get that faster lens. When you underexpose and then adjust in the conversion of the raw file you get more noise then a properly exposed image, and in low light you are often fighting noise anyway.

Labels: , , ,

Wildlife Photography


_DSC4026, originally uploaded by shutterhack.

Taken with a Nikon D50 and AF Zoom-Nikkor 70-300mm f/4-5.6G lens

Of all the things there are to photograph I find animals, birds and insects the most satisfying and the most difficult. They almost never do what you want them to and are most likely to do whatever you least expect. The best way to photograph animals is in the wild.

Manual Focus

When photographing animals you need a lot of patience, they either do nothing for long periods of time or they are so hyperactive that you can't keep them in the viewfinder. What you need to do is study the animal for a while and try to predict their next move. Birds will often follow a definite flight path so, if you can work out what it is, you can just wait until they fly past a certain point. I usually switch to manual focus when photographing birds as the auto focus can often end up trying to focus on the empty sky.
Long Lens

Animals, especially in the wild do not let you get very close to them so an essential piece of kit for photographing animals is a long lens preferably a zoom. I use a 75-300mm zoom and, more often than not, I end up using it at the 300mm end. Ideally I would like a 500mm lens but good ones cost quite a lot of money and you really need to use it on a tripod. The general rule of thumb for handholding without camera shake is to use a shutter speed greater than 1 divided by the focal length of the lens. So a 500mm lens should be used at shutter speeds greater than 1/500th of a second. With this in mind it's also a good idea to choose clothing that will help you blend in with your surroundings.

Labels: , , ,

Lens Contrast (Part 3)


_DSC4753, originally uploaded by shutterhack.

Taken with a Nikon D50 and AF Zoom-Nikkor 70-300mm f/4-5.6G lens

At coarser levels (or "for larger structures," as optical jargon might put it), say 5 lp/mm, you can have more of one than the other, and, indeed, lens designers make choices in these areas. I have one lens, the Leica 35mm F/2 Summicron-R, which has very high large-structure contrast, but not terribly good resolution. That is, if you shoot with a very fine-grained film and look at the detail under a microscope or in well-made enlargements, you may see finer actual detail in pictures made with other lenses yet the Leica lens has a very high (and very pleasing!) sense of subjective "sharpness".

To see a great visual demonstration of this, check out Canon's excellent primer on optics at the back of their book Lenswork (a must-read for any photographer interested in, but not trained in, optics). They show the same picture (of a cat) with a.) poor contrast and poor resolution, b.) good contrast but poor resolution, c.) good resolution but poor contrast, and d.) both good resolution and good contrast. This will "key" your eye in to what is meant by lens contrast better than any verbal description can. As you can see from those illustrations, it has nothing to do with overall contrast of the sort we mean when we talk about paper grades.

Labels: , , ,

Lens Contrast (Part 4 : Color Creates Contrast)


_DSC4486, originally uploaded by shutterhack.

Taken with a Nikon D50 and Nikon AF-S Zoom-Nikkor ED 18-55mm f/3.5-5.6G DX (kit-lens)

The issue is further confused by color, since color sometimes functions similarly to contrast. Imagine two areas in an image of similar value, but one red, and one green. Take a picture of this with black-and-white film, and you have one undifferentiated gray.

Take a picture of it in color, and the green area easily stands apart from the red area and vice-versa. Although it has nothing to do with optical or sensitometric contrast, color contrast helps with definition and hence with a sense of general image clarity. What this means is that different lenses perform differently or perhaps I should say "to different tastes" in black-and-white and color.

I conjecture that Leica designers used to pay most attention to relatively low-cycle contrast, meaning in the 5—20 lp/mm range, and then let resolution fall where it may. This is the smartest approach (in my opinion) for black-and-white film. Lenses which have been optimized this way look best for black-and-white. But now that so many people are shooting in color, giving a little more weighting to resolution at higher frequencies (as, say, Canon and Mamiya seem to do pretty consistently) and expecting color to "help with contrast" is a smart approach, too.

Labels: , , ,

Lens Contrast (Part 5 : MTF Chart)


_DSC4270, originally uploaded by shutterhack.

Taken with a Nikon D50 and AF Zoom-Nikkor 70-300mm f/4-5.6G lens

Basically, how lenses are evaluated is by looking at how well they transmit evenly spaced lines of black and white; ten, 20, or 30 "line pairs per millimeter" (lp/mm) means exactly what it says. As these lines get more and more closely spaced, the "noise" between them blurs the edges and makes the black lines look dark gray and the white lines look light gray to the lens (and also to your eye, especially as you get farther away). As the lines get closer and closer together, pretty soon the lens canþt distinguish them tonally, and the lens "sees" one undifferentiated gray. This ability on the part of the lens, charted graphically, is what MTF, or Modulation Transfer Function, is all about.

MTF graphs typically chart a lens's performance at various "image heights". This just means the distance from the optical axis, which would correspond to the center of the negative. The exact center would have a height of zero, and so forth out to the corners. Thus, the left-hand side of most MTF graphs corresponds to the center of the image, and as the graph line moves to the right, it corresponds to areas of the negative further from the center. So the MTF chart describes a radius of the image circle cast by the lens. Any other radius from the optical center is presumed to mirror the one that's charted (which assumes the lens elements are perfectly centered, but manufacturing defects and quality control is another article).

Labels: , ,

Lens Contrast (Part 6 : MTF Chart)


_DSC4091, originally uploaded by shutterhack.

Taken with a Nikon D50 and AF Zoom-Nikkor 70-300mm f/4-5.6G lens

You'll note that most MTF charts have two graph lines per frequency, one solid and one dotted. This just measures object lines ("object" in opticspeak corresponds to what we'd call the "subject", what the lens is pointed at and focused on) that are either parallel to the radius of the image circle (called "sagittal") and those that are perpendicular to the radii ("tangential"). Most lenses are unable to do equally well with both simultaneously.

Technically speaking, MTF measures both contrast and resolution more or less simultaneously. In a photographer's reading of an MTF chart, however, generally the position of the topmost lines (typically 10 lp/mm, sometimes 5) will have the highest correlation to visible lens contrast. The lowest set of lines (30 or 40 lp/mm) will correspond best to actual resolving power. Personally, I pretty much ignore the lowest set or sets of lines when reading an MTF chart.

You should note here that different manufacturers provide different MTF frequency measurements. One company may provide 5 lp/mm graph lines, which makes their lenses look good. These lines are often very close to the top boundary of the chart. Other manufacturers may provide lines for 10 lp/mm as the coarsest structures they measure. The two shouldn't be compared directly. In fact, MTF charts from two different sources shouldn't be compared directly, either. There are enough experimental and procedural variations to make direct comparisons meaningless.

Labels: , ,

Lens Contrast (Part 7 : MTF Chart)


_DSC4099, originally uploaded by shutterhack.

Taken with a Nikon D50 and AF Zoom-Nikkor 70-300mm f/4-5.6G lens

To get a really good idea of a lens's performance using MTF, you'd need a "family" of charts. For starters, every lens will perform differently at different apertures and at different distances. Just charting an F/16 lens for three different object distances — say, infinity, close focus, and perhaps 20 x F, where F = focal length, would mean you'd need 21 different charts. Really, you should have charts for at least six (and ideally, thirty!) randomly-chosen production samples, too, to account for sample variation. There are a dozen or so other conditions you should measure at every aperture and taking distance. You can see how the volume of data would quickly get out of hand for enthusiasts. But do bear in mind that when manufacturers give you one chart, it only measures performance at one aperture and one distance. That doesn't really tell you much, except comparatively, and it may not tell you want you need to know.

Often, usefully (sort of), they'll provide two charts; one for the lens stopped down, and one for full aperture. The more closely these two charts resemble each other, the better and more consistent the performance of the lens is likely to be across the range of apertures. (I say "sort of" usefully because open-aperture charts for an F/1.4 lens and an F/2 lens wouldn't tell you how the same lenses compare when they're both at F/2, which might be practical information to know.)

Incidentally, as an aside for those of you who may have seen the articles on "bokeh" (bo-ke, the Japanese word meaning "blur") in the March/April 1997 issue of PHOTO Techniques, off-axis aberrations are typically the cause of "bad" or confused-looking blur. The relative superimposition of the sagittal and tangential lines of an MTF chart are one predictor of "good" or smooth bokeh.

Labels: , ,

Lens Contrast (Part 8 : MTF Chart)


_DSC3814, originally uploaded by shutterhack.

Taken with a Nikon D50 and AF Zoom-Nikkor 70-300mm f/4-5.6G lens

Then, the wide-open chart should look as much like the stopped-down chart as possible (predicting consistent performance throughout the aperture range). The lenses that most closely approximate this description are highly corrected short telephotos of moderate aperture. Designers often have somewhat more money to work with when designing macro lenses, so macros such as the 100mms from Leica, Zeiss, and Canon, and the Zuiko 90mm F/2 from Olympus, probably can be said to have the best MTF charts I've seen.

Labels: , , ,

Hi! I'm an alien from this spaceship.


_DSC4680, originally uploaded by shutterhack.

Taken with a Nikon D50 and AF Zoom-Nikkor 70-300mm f/4-5.6G lens

By 'exposure' we mean the amount of light that falls onto the film, or CCD if you are using a digital camera. In modern cameras the exposure is usually set to automatic by default and, most of the time, it can be left there and will produce beautiful pictures. There are times though, when the lighting conditions are difficult or we want to produce a particular effect and it would be nice to understand what is going on 'under the hood'.

The problem with all types of film and recording media is that they cannot record the entire range of contrast (black to white) that the eye can see. Especially when you take into account that the eye is constantly adjusting to cope with high contrast. On a sunny day if you look into the shadows of a scene then into the bright areas, the iris in your eye will quickly adjust so you can see detail in both.

Faced with the task of recording as much information as possible, the camera will try to average out all the light levels and expose the film accordingly. As burnt out highlights are normally considered uglier than black shadows, the camera, left to it's own devices will normally err on the dark side. Which is no good if you are shooting someone's face against a bright sky. It's the person's face you want to see, and you don't really care if the sky is white.

Labels: , , , ,

Lens Contrast (Part 9 : Flare And Glare)


_DSC4131, originally uploaded by shutterhack.

Taken with a Nikon D50 and AF Zoom-Nikkor 70-300mm f/4-5.6G lens

So far I've mentioned overall contrast and lens contrast. The final type of contrast we have to deal with is something still different from either of the two definitions above, and this is "local contrast", or tonal differentiation within certain specified tonal ranges. A film/paper combination whose characteristic curves interrelate in a certain way can yield high highlight contrast (i.e., not much tonal discrimination in the highlights, but a greater sense of "snap" in the gradation you do see) and low shadow contrast, or good shadow contrast and low highlight contrast. In lenses, local contrast issues are accounted for mainly by flare and veiling glare, and are affected mainly by lens coatings. A lens can have exactly the same level of overall contrast (i.e., it will transmit the same overall range from light to dark), but it might have much worse shadow contrast, for instance, in certain real-world situations. Meaning, there will not be as much separation between slightly different shades of gray in very dark areas of the picture. (Transmission of color is also very much affected by the efficiency of the coatings and the relative contribution of flare.)

The big question mark where local contrast is concerned is that almost all actual picture-taking situations allow flare and veiling glare (the latter an overall dulling or haze of the image similar to "flashing" an enlargement with a low dose of non-image-forming light, or fog) to contribute in varying amounts and varying ways. Despite lots of scientific research, there still seems to be not much way to quantify it exactly, or predict its contribution exactly with any given system ("system" meaning camera-lens/film/enlarger-lens/paper) in real-world situations. Flare is always present to at least some degree, but it is seldom present in exactly the same way in two different systems encountering two different situations.

Before lens coatings were invented, lens flare was a major determinant of image quality. The best lenses were generally the ones that allowed performance to remain high with the fewest elements, because there were fewer air-to-glass surfaces to create flare. This explains the lifespan of the exceptionally long-lived Tessar-type, despite its speed limitations. Lens coatings are of critical importance to modern lenses; virtually all zoom lenses and many highly-corrected multi-element lenses would be useless for general photography without them. Often, coating is what makes the most difference between an average lens and a very good one.

Have you ever noticed how many early 35mm photographers tried to avoid bright sunlight? You might be forgiven for thinking that the decade of the 1940s was entirely overcast (and not just by the world political situation). With experience as their teacher, many photographers in the '30s and '40s learned various clever ways of avoiding or minimizing high-flare situations. The amateur admonition to "never point the camera in the direction the sunlight is coming from" dates from this era. Such was life with "miniature" cameras before the days of multicoating.

Labels: , , ,

Lens Contrast (Part 10 : Conclusion)


_DSC4487, originally uploaded by shutterhack.

Taken with a Nikon D50 and AF Zoom-Nikkor 70-300mm f/4-5.6G lens

In my opinion, lens contrast of fairly large image structures is a primary determinant of subjective optical quality in a camera lens. The old Leica 7-element 50mm Summicron was optimized for high contrast at 5 lp/mm, for instance, and under favorable picture-taking circumstances (i.e., avoiding too much flare and too wide an aperture), these lenses can still yield glorious-looking pictures today.

Also, it's very interesting to note that high apparent lens contrast can be simulated digitally, and this may eventually prove to be an Achilles heel for silver-halide photography where viewer appeal of prints is concerned. "Sharpening" only improves visual microcontrast, of course, not actual resolution of detail. But resolution of very fine structures seldom helps pictorial photographs much, and, in my opinion, is an overrated property where lens quality is concerned.

Labels: , , ,

You talkin' to me?


_DSC3677, originally uploaded by shutterhack.

Taken with a Nikon D50 and AF Zoom-Nikkor 70-300mm f/4-5.6G lens

Labels: , , ,

A subject never organizes itself


_DSC4776, originally uploaded by shutterhack.
Taken with a Nikon D50 and AF Zoom-Nikkor 70-300mm f/4-5.6G lens

"A subject never organizes itself in a photograph or drawing or painting. The artist consciously or subconsciously organizes it."

It organizes itself in terms of human vision...I'm feigning that the subject is animate here in order to distinguish between seeing it through an overlay of rules, desires, and requirements -- speaking in terms of the non-professional photographer who doesn't have an obligation to fulfill with a photograph, or who is not creating the subject and frame on a stage in a studio (including on location) -- and seeing it as it is presenting itself to the photographer.

This "presenting" has to have some value in terms of photography if it has captured the photographer's attention and caused him to release the shutter. What the subject can't do is organize itself in terms of the camera's "vision". The photographer has to do that consciously -- the classic example of the tree seemingly growing out of someone's head.

The camera can "see" things normalizing human vision may not. I photographed a house down the street. It wasn't until I saw the photo that I could see that the house was definitely not plumb, that it leaned strongly one way. Unlike a tree growing out of someone's head, it made for a stronger photograph although I never saw it through the viewfinder.

I've been limited to photographing nearby and easy to get to things that normally wouldn't have interested me. I've had to overcome frustration and anger and to relax and let photography happen to me in the mundane, banal, obvious, commonplace universe of houses, streets, and lawns, or whatever is available from the roadside.

Letting go of my preconceptions, moods, and attitudes, by letting the subject/frame appear without my forcing it, has made me a better photographer, better able to continue my "real" photography when I can, and grateful, rather than frustrated and angry, over circumstances.

Labels: , , ,

Bark in the bush


_DSC4074, originally uploaded by shutterhack.

Taken with a Nikon D50 and AF Zoom-Nikkor 70-300mm f/4-5.6G lens

Labels: , , ,

Size is relative


_DSC4485, originally uploaded by shutterhack.

Taken with a Nikon D50 and Nikon AF-S Zoom-Nikkor ED 18-55mm f/3.5-5.6G DX (kit-lens)

Labels: , , , ,

Underexposure is the greatest generator of noise


_DSC4097, originally uploaded by shutterhack.

Taken with a Nikon D50 and AF Zoom-Nikkor 70-300mm f/4-5.6G lens

To deliberatly underexposed the photograph at the time of taking it and hoping to correct or alter the 'ev' value in RAW-post processing software is not a great plan. While you can compensate for under exposure with RAW, if you are talking about a couple of stops, you create a noise machine from your camera. Don't have the science but underexposure is the greatest generator of noise. 1/2 a stop you can get buy, 1 stop you will start seeing noise, > 1 stop forget about it.

Labels: , , ,

Better to overexpose then darken in RAW conversion


_DSC4481, originally uploaded by shutterhack.

Taken with a Nikon D50 and Nikon AF-S Zoom-Nikkor ED 18-55mm f/3.5-5.6G DX (kit-lens)

RAW is only a tiny bit better than with jpeg but generally the only reason to underexpose is to avoid highlights blowing out, and RAW does give more than a tiny bit of latitude in recovering highlights.

In fact if you've got the light, it's better to overexpose then darken in RAW conversion to reduce noise. The way to do what you want is to increase ISO... that also increases noise but not as bad as underexposing.

If you have to underexpose, the way to make the noise less objectionable is to simply print it dark or at least adjust so the shadows remain dark and only raise the highlights.

Labels: , , ,

Auto level and auto contrast


_DSC4679, originally uploaded by shutterhack.

Taken with a Nikon D50 and Nikon AF-S Zoom-Nikkor ED 18-55mm f/3.5-5.6G DX (kit-lens)

There is a 'magic button' in Photoshop called 'auto levels' which you will find under the 'image' menu on the 'adjustments' sub menu.

Hitting 'auto levels' is always worth a try, it sometimes produces just the result you were looking for or, at least, a good place to start. If you don't like the result then hit the undo button on the edit menu and move on to plan B.

If you tried 'auto levels' and liked the overall brightness and contrast but the colour balance was worse than before then try 'auto contrast' instead. This does the same job as 'auto levels' but without altering the colour.

Labels: , ,

Misty morning


_DSC4692, originally uploaded by shutterhack.

Taken with a Nikon D50 and Nikon AF-S Zoom-Nikkor ED 18-55mm f/3.5-5.6G DX (kit-lens)

Fog tends to fool even incident meters because there's so much reflectance from the damp air. Sometimes closing down a half stop from the incident meter reading gives pretty satisfactory results.

The key to avoiding fogged lenses is to make sure the camera is about the same temperature as the outside air. Taking a warm camera into a cold environment can cause fogging inside the lens, which is hard to deal with but less common than the other problem - taking a cold (e.g., air conditioned) camera into a warm, humid environment.

We have systematically tried to replace every natural aspect of society with inanimate artificial objects, telephone poles instead of trees, sewer systems instead of streams, cement instead of grasslands, killing animals when our stores and homes are full of food, this numbness to cruelty, this phobia of true life has made it necesary for doctors to cure the body, psychologists to cure the mind, but nothing will ever cure mind, body, and spirit... Nothing! Except for the healing embrace of NATURE.

Labels: , , ,

Stadium sundown


_DSC4484, originally uploaded by shutterhack.

Taken with a Nikon D50 and Nikon AF-S Zoom-Nikkor ED 18-55mm f/3.5-5.6G DX (kit-lens)

Labels: , , ,

Aperture


_DSC4277, originally uploaded by shutterhack.

Taken with a Nikon D50 and AF Zoom-Nikkor 70-300mm f/4-5.6G lens

As well as letting more or less light into the camera the size of the aperture you choose governs the 'Depth of Field'.

Depth of field means the amount of the picture, from foreground to background, that is in sharp focus. A smaller aperture will give you a greater depth of field and a larger aperture will give you a more restricted depth of field. This characteristic can be used to good effect in many ways.

Labels: , ,

Those eyes


_DSC4419, originally uploaded by shutterhack.

Taken with a Nikon D50 and Nikon AF-S Zoom-Nikkor ED 18-55mm f/3.5-5.6G DX (kit-lens)

My opinion:

The choice of lens does not signify anything except for the fact that it is only an instrument to capture the moment, if using a tele lens has better chance of capturing the moment isolated from the background and if it improves the chance of being unnoticed then so be it... I use a 70-300 and a 18-55 and shoot from a distance or from close range... but it is true that a street photographer cannot afford to be shy or be afraid to confront or pacify his subject in situations.

I like to capture fleeting moments, candid portraits and this does not give me an option to introduce myself to my subjects with my visiting card before I take the shot... I believe that empathy for the subject - if important to the photographer - should show in his/her work... morality is a subjective issue, not an absolute one... I am not the one who can figure out whats on a person's mind if and as he knows that he is being photographed... did he like being photographed? Did he dislike but was too polite or shy to tell me that he didn't want to be photographed? Well... as long as I do not know, I assume implicit permission from my subject. If I wanted to find out explicitly I would be talking and not capturing the moments that I wanted to capture.

I wonder what would one do if he was required to obtain permission before he took the wonderful pictures showing the moods and moments of dogs. [this is not no imply that dogs are same or different from human beings as photographic subjects ;-) ].

As Elli Wallach said in the movie 'The Good Bad and the Ugly' - "When you shoot, you shoot, don't talk"...it was shooting of a different kind though but its principle applies to street photography as well.

But it is also true that the photographer can introduce himself to his subjects and win their trust and take pictures over weeks and months...this improves the chances of better framing, lighting and yet capturing the candid mood and the moment since the photographer is not viewed as an alien any more and can work at close range without worried about being spotted.Often I visit a place where I am familiar face now, at least to quite a few, and returning with gift prints helps to build a friendship. I can take pictures with the candid mood working at close range...sometimes point blank with a wide lens But that is fundamentally different from the pictures you take as you walk down the street while trying to keep yourself inconspicous.

Many beginner photographers think that people don't like to be photographed and this may be true in many places but from my experience in taking people shots in streets of Tokyo, New York and Calcutta, I can say that it is not generally true...many do like to be photographed, many dont even know if they are being photographed and most apparently dont care even if they know. There are a few who are paranoid about being photographed and certainly I am not going to let the moment pass by making such an assumption. If someone finds out - as sometime someone always does since not everybody can blend in like a fly on the wall - and expresses dissent, I shall respect that. Although, in some situations I have also asked permission before shooting.

The street is a public place and the photographer has as much right as the artist with a sketch book making sketches of people. The problem is that the barrel of the lens pointing at someone could have a different psychological effect than the brief glances of the sketch artist.

Street photography is not about photographing poverty, squalor or misery, it is not about photographing homeless people on the streets, it can show humorous, funny, sad, joyful etc moments. A true street photographer's natural instinct is to shoot first and to worry later.

Labels: , , , ,

Getting everything in focus


_DSC4035, originally uploaded by shutterhack.

Taken with a Nikon D50 and AF Zoom-Nikkor 70-300mm f/4-5.6G lens

When photographing very small objects like the leaves (as in the picture above) getting everything in focus can be quite a challenge and may require a very slow shutter speed in order to be able to use the smallest aperture available. The focal length of the lens makes a difference to the depth of field available, the longer the lens the more restricted the depth of field. A wide angle lens will give you almost limitless depth of field.

Labels: , , ,

Light is light, is light...


_DSC3888, originally uploaded by shutterhack.

Taken with a Nikon D50 and AF Zoom-Nikkor 70-300mm f/4-5.6G lens

My opinion:

Light is light, is light... its diffused, its direct, its reflected, its coloured... yes. But its also different in each context because it changes the mood of a photograph. A park at noon is quite likely to be much more drab than a park in the morning. Both in direct sunlight, but the morning's sun a bit more yellow/golden, and streaming through the branches at an angle...

Light is all around you, but actually looking for interesting light will help you understand it better. I'd also add that looking at just the light is not enough, look at the textures, effects, patterns and paths that it creates, look for colour casts, reflections, flare, and sparkles as it reflects off various surfaces...

If you're a photographer who wants to work in a studio at some point of time, looking for, and remembering lighting moods and feels is invaluable when you're trying to recreate emotions in a studio environment.

Labels: , , , ,

20 years of Timberland


_DSC3706, originally uploaded by shutterhack.

Taken with a Nikon D50 and AF Zoom-Nikkor 70-300mm f/4-5.6G lens

Labels: , , ,

I refuse to compromise...


_DSC4485-2, originally uploaded by shutterhack.
Taken with a Nikon D50 and Nikon AF-S Zoom-Nikkor ED 18-55mm f/3.5-5.6G DX (kit-lens)

A friend of mine from a photography forum once said:

The late Richard Avedon comes to my mind as someone who was able to make a living as a commercial photographer and still be considered an artist. This would be the ideal situation to be in I would think but for most of us weekend warrior types we just have to be satisfied with making images that mean something to us even if it doesn't generate income or prestige.

I'm always told by friends and co-workers who see my work that I should become a pro. They never fail to look at me weird when I tell them I have no desire to do so. This is not because my day job is so exciting and fulfilling but because I simply like to shoot what I like to shoot, not what someone else wants me to shoot.

As a joke I tell people (while pounding my fist on whatever flat surface is within reach) "I refuse to compromise my artistic principles".

Labels: , , , ,

Burung kerak nasi


_DSC4122, originally uploaded by shutterhack.

Taken with a Nikon D50 and AF Zoom-Nikkor 70-300mm f/4-5.6G lens

Labels: , , ,

Texture, a commonly overlooked element


_DSC3906, originally uploaded by shutterhack.

Taken with a Nikon D50 and AF Zoom-Nikkor 70-300mm f/4-5.6G lens

One of the most commonly overlooked elements you can focus on is texture. Trying to show someone how an object feels can be as difficult as describing the colour green to a blind woman.

Noise reduction algorithms smooth out the luminance and colour variation between nearby pixels. This is great when you’re shooting something that should be a uniform colour or gradient. Unfortunately, noise reduction will suck out a lot of the textural detail you’re trying to preserve. However, if you followed my earlier advice and shot the photo at your lowest ISO, you shouldn’t need to worry about this. If you have to clean the noise up, create a Photoshop mask to ensure you’re not applying the filter to your subject.

Labels: , , ,

Why use manual exposure?


_DSC4773, originally uploaded by shutterhack.

Taken with a Nikon D50 and AF Zoom-Nikkor 70-300mm f/4-5.6G lens

The advantage of manual exposure is that the settings do not keep changing as your scene changes. Let's suppose that you are taking close up photos of cars passing by. Some of the cars will be black or dark colours and some will be light colours or white. If you are filling the frame with almost nothing but car, the meter will be trying to render each car as mid grey. Although it will probably not succeed, what you will notice is that the background is a different shade in each photo.

I often have to take portraits of people, some are wearing very dark clothes and some are wearing white. If I am not careful with my light readings the skin tones will be affected by the clothes.

Although it is by no means always necessary to use manual exposure, an understanding of how it all works will save a lot of disappointment.

Labels: , ,

Orange and Black


_DSC4854, originally uploaded by shutterhack.

Taken with a Nikon D50 and AF Zoom-Nikkor 70-300mm f/4-5.6G lens

Labels: , , , ,

Photographing and zombifying


_DSC4742, originally uploaded by shutterhack.
Taken with a Nikon D50 and AF Zoom-Nikkor 70-300mm f/4-5.6G lens

All my life I have been a wanderer, I love to get out there and hike and see things. This is where I do most of my thinking. This is my alone time. This is my exercise. I have stood on a beach at sunset and have been in absolute awe at the beauty of the world without the camera. Now I bring it along. I'd still be out there without my camera, exploring nature, or streets, or the dump, but now my aimless wanderings have a bit more of a point.

However with the camera I dwell less in free thoughts, I may wander less to stay in a particularly nice spot, so it's not a hundred percent positive thing. But it gives me goals instead of just mucking about. It gives my wandering an excuse, a little something to bring home besides a clearer mind and a cardiovascular workout.

So I guess I don't even photograph to make photographs, in a way it's more of a game to play when I'm outside of four walls. Let's see what I can fit in the box and take home. Plus it's nice to have a creative outlet and it beats sitting in front of the TV, zombifying. And when I'm stuck at work like I am now I can read interesting things about it online. It gives my mind the sense of learning new things, so it does not stagnate.

Labels: , , ,

Shutters Speeds and Apertures: What do the numbers mean?


_DSC4642, originally uploaded by shutterhack.

Taken with a Nikon D50 and Nikon AF-S Zoom-Nikkor ED 18-55mm f/3.5-5.6G DX (kit-lens)

If you look at the exposure display in your viewfinder you will see two numbers. On a normal sunny day you might see something like '125 16' or '500 5.6'. The first number is the 'shutter speed' and is simply the time that the shutter will be open for, expressed as a fraction of a second. So 125 means that the shutter will be open for 1/125th of a second, and 500 means that it will be open for 1/500th of a second.

The second number, sometimes referred to as the f-stop, tells you the size of the hole (aperture) in the lens. This number is also a fraction. The number represents the focal length of the lens divided by the diameter of the aperture. So an aperture that is 10mm in diameter in an 80mm lens will have an f number of f/8 and the setting f/16 on the same lens will be 5mm across.

From this you can see that if you change the lens to one of, say, 160mm focal length then the size of the f8 aperture will be 20mm. However, because the diaphragm is now twice the distance from the film the same amount of light will reach the film. This is a bit complex but if you have a mathematical bent and you draw it all on paper you will see why (see inverse square law). If not, just take my word for it. Now you can see that a larger 'f' number, say f/16, is actually a smaller hole and lets in less light than f/8.

Labels: , , , ,

Voyeurism or window shopping?


_DSC4881, originally uploaded by shutterhack.
Taken with a Nikon D50 and AF Zoom-Nikkor 70-300mm f/4-5.6G lens

With both voyeurism and window shopping you are on the outside,looking in. But, I hope most photography leans more toward window shopping (innocent and fun) than voyeuristic because it has a negative connotation and sounds more like you are exploiting the subject.

I think photography is more interactive than either because of the connection between the photographer and his subject. The subject may not be aware of a voyeur; but the shopkeeper is very aware of the window shopper and has put up his display to attract their attention. Most of the time the photographer is contemplating the subject perhaps like a window shopper contemplates the purchase.

The voyeur is just plain stealing his pleasure...perhaps like a street or PJ photographer would. A wedding/studio photographer would be more like the window shopper. Now what about the nature photographer? A little of both, I think.

Labels: , , , ,

Air Asia


_DSC4767, originally uploaded by shutterhack.

Taken with a Nikon D50 and AF Zoom-Nikkor 70-300mm f/4-5.6G lens

Labels: , ,

ISO rating for Film Speed


_DSC4858, originally uploaded by shutterhack.

Taken with a Nikon D50 and AF Zoom-Nikkor 70-300mm f/4-5.6G lens

ISO stands for 'International Organization for Standardization' and their film speed ratings are used to indicate the relative amount of light necessary to give a proper exposure. A normal film will be rated at ISO 100. A film rated at ISO 200 will give a proper exposure with only half the amount of light compared to the ISO 100 film, enabling you to shoot in lower light or with a smaller aperture or faster shutter speed. The ISO 200 film would be referred to as a 'faster' film. There are films available that range in speed from ISO 25 to ISO 1600.

So why not use the faster films all the time, what are the advantages of slower films?

The faster films have a more prominent grain structure the individual grains clump together to form spots that are visible to the naked eye, especially when you blow the photo up to A4 or larger from a 35mm negative. In certain circumstances this effect can be used creatively especially in black and white photography but mostly it is undesirable.

How does all this effect digital cameras?

In the digital photography world the phenomenon is called 'noise' not 'grain', the cause of the problem is slightly different. When light levels are low, the sensor has trouble reading the scene properly and pixels of random colour are thrown into the picture. However to us photographers the end result is the same or very similar.

Labels: , ,

Graveyard greens


DSC_0155, originally uploaded by shutterhack.

Taken with a Nikon D50 and AF Zoom-Nikkor 70-300mm f/4-5.6G lens

Labels: , ,

The right mental perspective


_DSC3659, originally uploaded by shutterhack.

Taken with a Nikon D50 and AF Zoom-Nikkor 70-300mm f/4-5.6G lens

There's nothing on this planet that can 'not inspire'. If you look at a piece of trash and say "How could I possibly be inspired by this?" you're not looking beyond the obvious. Here's a couple of different ways in which to look at a piece of trash:

* If it's an interesting piece of trash (not at all as rare as you may imagine), look for interesting shapes, colours, reflections, juxtapositions, etc...
* If its not, look around, look at it in the bigger social context. What can you find that is relevant (or irrelevant) 10, 15 or 20 feet from it. What are the kinds of people in the vicinity? are they affected by it's presence?
* Or you could just figure that the piece of trash should not be there in the first place... so why is it? you could do a series of pictures on why and how it got there.

So, you see, its only a matter of looking at it with the right mental perspective.

Labels: , , ,

Palm trees


_DSC0946, originally uploaded by shutterhack.

Taken with a Nikon D50 and AF Zoom-Nikkor 70-300mm f/4-5.6G lens

Labels: , , ,

Buah cermai


_DSC3684, originally uploaded by shutterhack.

Taken with a Nikon D50 and AF Zoom-Nikkor 70-300mm f/4-5.6G lens

Labels: , ,

Mat Sha's new wheel Proton Neo


_DSC3931, originally uploaded by shutterhack.

Taken with a Nikon D50 and AF Zoom-Nikkor 70-300mm f/4-5.6G lens

Labels: , , ,

Pot of leaves


_DSC4279, originally uploaded by shutterhack.

Taken with a Nikon D50 and AF Zoom-Nikkor 70-300mm f/4-5.6G lens

Labels: , ,

City kids in the country


Noreen and Arif, originally uploaded by Fadzly Mubin.

Taken with a Sony DSC-T5

Location: Kuala Pilah, Negeri Sembilan, Malaysia

Labels: , , ,

Noreeen and Arif


Noreen and Arif, originally uploaded by Fadzly Mubin.

Taken with a Pentax K100D and Pentax DA 18-55mm f/3.5-5.6 (kit-lens)

Location: KLCC, Kuala Lumpur

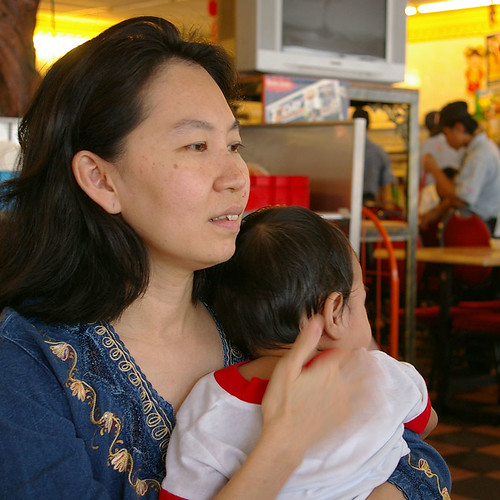
So what makes a good portrait of someone is that it should say something about that person that we feel is true. A good portrait sums up the character of the person or at least an aspect of their character. You don't know the lady with the baby, looking at her photo, you have made some judgements about her and you have made some decisions about her character.

Labels: , , , ,

Clear cut lighting


DSC_0186, originally uploaded by Fadzly Mubin.

Taken with a Nikon D50 and AF Zoom-Nikkor 70-300mm f/4-5.6G lens
Location: Ladang Kuala Terengganu

A photographer friend once told me, “there’s only one sun, so why should I use 4 lights” what they mean is that the more directional lights you have, the more unrealistic your photograph will look. While this is not always a bad thing, you may want to take simple photographs with clear cut lighting so that the lighting does not take meaning away from your subject.

Labels: , , , ,