Sunday, July 1, 2007

Technically perfect


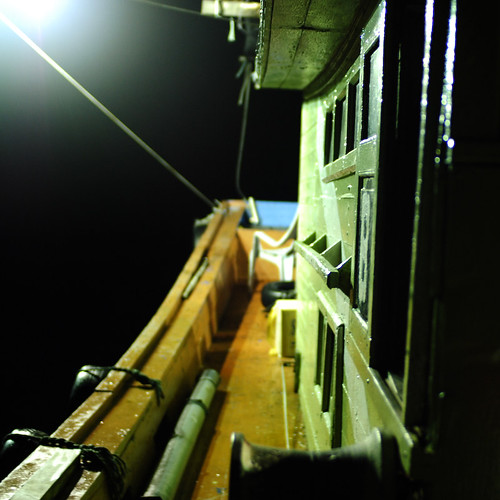
_DSC0165, Perhentian Island, Besut, Terengganu, Malaysia, originally uploaded by Fadzly Mubin.
On our way to catch some squid. Perhentian Island, Besut, Terengganu, Malaysia
Taken with a Nikon D40 digital camera and Sigma 30mm f/1.4 EX DC HSM lens

Every picture must be technically perfect, even if it doesn't say anything, or no one would bother taking a look at it.
Nonsense. If a shot is compelling, if the execution reinforces the mood, most people don't care about "technical perfection."
Instead of going out and looking to capture intersting scenes with your camera, you go out with a Microspcope looking for scenes that happen to be under perfect conditions.
More nonsense. Knowing how to utilize the conditions to convey what you want is what makes for a successful photo--there aren't "perfect conditions" that make your photos good.
Am I getting out of line here, because my technical skills are not up to par?
Frankly, yes. Instead of making up nonsense stories to rationalize why people aren't impressed by your shots, you should spend your energy improving your skills and trying to develop a better understanding of how to make your shots work.

Labels: , , , ,

All portraits are staged


_DSC0124, Perhentian Island, Besut, Terengganu, Malaysia, originally uploaded by hackspot.
Perhentian Island, Besut, Terengganu, Malaysia
Taken with a Nikon D40 digital camera and Sigma 30mm f/1.4 EX DC HSM lens

"Can they in fact be themselves in such an artificial environment sitting in front of the camera? I personally don't think they can."

I disagree. All portraits are staged, so I contend that they are just being themselves in an artificial environment. Whether they are "relaxed" or "comfortable" is a different question and the answer to that is dependent on both the sitter's psychology and the directorial skills of the photographer.

"Natural" vs. "artificial" light is a false dichotomy. It is false as in the distinction lies two implications:

1. that the photographer has given up some degree of control over a very fundamental formal aspect of their photography.

2. that natural light is somehow more "trustworthy."

Some photographers may be more comfortable just taking things as they find them (I sometimes am), but that doesn't relieve you of the decision of when and where and how to make the photograph.

"If they wear a ton of make up who am I to say they can't." Of course they can! It's their choice. But if you think it looks bad, why don't you think you have an obligation (as the person making the photograph) to point that out?

Labels: , , , , ,

Cool vista (_DSC0181)

Perhentian Island, Besut, Terengganu, Malaysia

Taken with a Nikon D40 digital camera and Sigma 30mm f/1.4 EX DC HSM lens

Labels: , , , ,

Rocky cliff side Perhentian Island (_DSC0238)

Perhentian Island, Besut, Terengganu, Malaysia

Taken with a Nikon D40 digital camera and Sigma 30mm f/1.4 EX DC HSM lens

Labels: , , ,

Predator (_DSC0089)

erhentian Island, Besut, Terengganu, Malaysia

Taken with a Nikon D40 digital camera and Sigma 30mm f/1.4 EX DC HSM lens

Labels: , , , , ,

The lady will be happy too


_DSC0091, Perhentian Island, Besut, Terengganu, Malaysia, originally uploaded by Fadzly Mubin.
Taken with a Nikon D40 digital camera and Sigma 30mm f/1.4 EX DC HSM lens

Kamel, my close friend since high school. He runs a holiday resort in the beautiful Perhentian Island, Malaysia called The Reef Chalets.

The Reef Chalets provide scenic and peaceful seaside accommodation and personalized services in 12 spacious seaside chalets set in a semicircle around an indigenous island garden. The Reef is strategically located on the big island a few minutes walk to the best snorkeling area and the most beautiful swimming beach with resident turtles.

Virtual Tourist - Pulau Perhentian Besar Travel Guide
Plan a Pulau Perhentian Besar vacation with reviews, tips and photos posted by real travelers and Pulau Perhentian Besar locals. link

My notes:

I notice that there seems to be a predominant opinion among most photographers/viewers that a portrait photo is BETTER when it is processed in a certain way. Especially with portraits of (younger) women I feel that most viewers automatically expect a face to be retouched in a way that it appears FLAWLESS.

This flawless look - in my opinion - is something extremely artificial and inhumane. In fact I often see portraits that remind me of a doll, or of the characters in my daughter's SIMS computer game, more than of live human beings.

I know how to produce this effect of slick perfection in my portraits. But - I simply don't WANT it. I don't WANT to remove the skin from my model's faces and replace it by a piece of plastic foil.

I think this "glamour look" is ok for a certain kind of "beauty photograph" style. I don't want this kind of cold and unpersonal perfection in MY pics though because I am interested in authenticity - true emotions, true beauty - whatever...

If I want to take a picture of my beautiful girlfriend I think it's the atmosphere of beauty more than anything else that does it. If she FEELS beautiful when I take her picture (because I let her know that for me she IS beautiful), then the picture will radiate this atmosphere of beauty...

I find it a little tedious to read remarks like "the lady will be happy too" if I would do some more "corrections". I believe actually "the lady" would have more reason to be INSULTED than to be HAPPY.

Labels: , , , , , ,

Saturday, June 30, 2007

The Perhentian Legend (_DSC0113)

Ayu and Helen listening to Prof. Dr. Wan Kadir telling us his version of the Perhentian Island Legend

Location: The Reef Chalets,
Perhentian Island, Besut, Terengganu, Malaysia

Taken with a Nikon D40 digital camera and Sigma 30mm f/1.4 EX DC HSM lens

My notes:

People, especially children, get bored very quickly. If you start fiddling with your camera telling them to hold on a minute you will never get good pictures. The most important part of the picture is the expression on the face. When you see that expression you must be ready to instantly capture it, everything else, the lighting, the background, the composition must be ready. Facial expressions, at least the good ones, are very fleeting things. If you ask someone to smile and you leave them holding that smile for even a second it will look very, very false.

Labels: , , , ,

SMS the lady back home (_DSC0164)

I told her to get some dinner from the restaurant next door but she insisted on waiting up for us.

Perhentian Island, Terengganu, Malaysia
Taken with D40 and Sigma 30mm f/1.4 EX DC HSM lens

Labels: , , , , ,

Friday, June 29, 2007

Natural studio backdrop (_DSC0212)

Location: Perhentian Island, Besut, Terengganu, Malaysia
Taken with a Nikon D40 digital camera and Sigma 30mm f/1.4 EX DC HSM lens

Monitor Calibration Part 5

After selecting a color temperature and gamma, the next calibration step involves setting the black (brightness) and white (contrast) levels to their optimum values.

Start by setting the black to zero and the contrast to 100%. On CRT monitors, contrast at 100% usually gives the most possible colors, but is sometimes uncomfortably bright. LCD monitors usually need the contrast reduced slightly to avoid blowing out all fine details. Your calibration software will guide you to getting the optimum level.

The brightness should be set so almost black is just barely distinguishable from pure black. Set brightness too low, and all your shadow details go dark. Set too high, the shadows get washed out. Again, follow the instructions in your calibration software. Most calibration software and/or hardware works best, however, if you start the adjustment process with the brightness and contrast controls set to their extremes. (Continued...)


Labels: , , , , ,

Nothing lasts forever (_DSC0257)

Location: Perhentian Island, Besut, Terengganu, Malaysia
Taken with a Nikon D40 digital camera and Sigma 30mm f/1.4 EX DC HSM lens

Monitor Calibration Part 6

Once you have the screen levels set, the Red, Green, and Blue guns need to be balanced so neutral colors do not show a color cast. Do as many of these adjustments by using your monitor's display controls as possible (don't worry, your calibration software will give details on how to do this). Adobe Gamma or any of the hardware calibration packages can do everything by adjusting your video card alone, but the result is a reduced color gamut for your display. This is not good, as you will clip the purest, most saturated colors. (Continued...)


Labels: , , , , ,

Shelter from the sun (_DSC0178)

Location: Perhentian Island, Terengganu, Malaysia
Taken with a Nikon D40 digital camera and Sigma 30mm f/1.4 EX DC HSM lens

Monitor Calibration Part 7

After the monitor is calibrated, a profile is made. If you used Adobe Gamma, the program merely writes out a profile table describing the adjustments you made made. If you used a hardware calibrator, the sensor measures a set of color patches to determine the limits of the monitors color display capability.

You can see which monitor profile Photoshop (version 6 and above) is actually using by opening Edit->Color Settings. Expand the RGB working space list, and scroll up. You'll see a line with "Monitor RGB - xyz." The file listed instead of xyz is the monitor profile Photoshop displays all images in. This is important to check, as some profiling software packages can write invalid profiles. If this occurs, Photoshop ignores the profile and displays in a default space that is guaranteed not to match your monitor. (Continued...)


Labels: , , ,

Double bed beachside bungalow (_DSC0118)

Me and Ayu get to stay at this bungalow during our visit to Perhentian Island.

Perhentian Island, Terengganu, Malaysia
Taken with D40 and Sigma 30mm f/1.4 EX DC HSM lens

Monitor Calibration Part 8

We have a pair of test images to help evaluate your monitor calibration. The first is a test of the black point and shadow performance. The second diagnoses incorrect gamma settings and provides an overall check of screen neutrality.

Notes:

  • Before you embark on any monitor calibration journey, make sure your display is suitably warmed up. This entails having the display on (and not in screen saver mode) for an hour or so. Also, try to minimize any glare on the screen, or light shining directly at the display. This is particularly important if you are performing calibration by eye.
  • The characteristics of a monitor change with time. It is a good idea to re-calibrate and profile your display every week or two.


Labels: , , ,

Sigma 30mm 1.4 focus errors


_DSC0237, Perhentian Island, Terengganu, Malaysia, originally uploaded by hackspot.
Location: Perhentian Island, Terengganu, Malaysia
Taken with D40 and Sigma 30mm f/1.4 EX DC HSM lens

This guide is a cut-n-paste from Bill's discussion on nikonians.org

I'll probably take some heat for saying this but...

AF errors original in the body and not with the lens.
AF, like metering, always occurs with the lens wide open so that's why aperture doesn't matter.
The decreased Depth Of Field (DOF) of the wider aperture is why AF errors are more apparent with fast lens.
Therefore I think you may have an AF issue with your D50 body.

There are many ways to test this; probably more than 50% of them are invalid.
All the tests that are valid have one thing in common; you AF on a target that is perpendicular to the camera, not at any angle.

Here are two variations:

1) On a tripod, with a focusing rail if available; AF on a target at the minimum aperture of the lens and then set the body to MF.
Take an image at the AF position.
Then move the entire camera away from the target a small amount and take another image.
Do it several times and then repeat moving the camera forward several times.
How much to move and how many images is not an exact science.
But with a target about 400-500mm away I'd say increments of about 5mm or 1/4 inch and about 5 images on either side of the AF position is a good place to start.
Examine the images, if they get sharper as you move the camera away or toward the target then AF accuracy is not perfect.
No camera is perfect, so the question is how bad?

For an example of what you might see look at A Technique for Measuring Relative Sharpness (2005-08-04 86/7071) on my web site.
The second chart in the initial post shows this nicely.

2) A variation on the "ruler shot".
Use a "lazy susan" or turntable and place a ruler so the face of the ruler runs through the center of the turntable.
AF at the minimum aperture with the ruler perpendicular to the camera and set the body to MF.
Rotate the turntable about 45 degrees and take your shot.
You should not be too close to the target with a wide angle lens because this will distort your perception of the result; but a gross AF will clearly show.

If your body needs AF adjustment it is best done my Nikon.
But if you're gutsy and the D50 is like the D70 then you can take a look at this AF Sensor Nerdvana Achieved

Good luck!!!
Bill

Visit me at: http://home.comcast.net/~NikonD70

"AF Sensor Nerdvana Achieved"

PREFACE

I will preface this post by saying that in taking over 24,000 pictures with my D70 I have never had problem with an image that I attributed to an AF Sensor adjustment issue. However, in more exacting tests of image sharpness; I have known for some time that my D70 has been back-focusing slightly. So, as winter sets in; I have decided to adjust my AF accuracy. I'll outline what I did but this procedure clearly is not for everyone.

BACKGROUND

AF accuracy depends in large part on adjusting the AF mirror. The mirror needs to be adjusted so the distance from mirror to AF Sensor and the distance from mirror to CCD Sensor match.
The adjustment is performed by turning an elliptical peg that the mirror rests against in the D70 body. There are two pegs, the one closer to the CCD sensor adjusts the AF mirror, the other controls the Viewfinder mirror. The peg accepts a 2mm hex wrench.

The Viewfinder and AF mirror adjustments interact. If I were adjusting both I would do the Viewfinder first; but my Viewfinder seemed fine so I went straight to the AF mirror adjustment.

Obviously, to perform this adjustment you need a good way to judge sharpness. I use custom written software to analyze the raw linear data in NEF files to get an "objective" measure of sharpness.

See the cached Nikonian thread on my web site entitled A Technique for Measuring Relative Sharpness (2005-08-04 86/7071) (particularly post#7) for details.
(The average and standard deviation in Photoshop histograms could be used to approximate my technique.)

PROCEDURE

My D70 was mounted on an Adorama focusing rail (really a focusing stage) on a tripod.
My test target was alternating white and black lines on a vertically positioned LCD monitor.
(My sharpness measure requires a repeating high contrast image.)
I used a 50mm f/1.8 AF Nikkor at f/1.8 at a distance of approximately 500mm from the target.

To collect one set of data I would
  1. AF with a half-press of the shutter
  2. Switch the body from AF to M focusing
  3. Move the body forward 3mm
  4. Take 7 shots moving the body backward 1mm after each shot
  5. Switch the body back to AF from M focusing
The result is 7 images (from -3 to +3) centered about the AF point.

I would compute sharpness for the 7 images and plot the result.
The desired result is a U-shaped curve with 0 as the sharpest point.
Lines that slope up are front-focus; lines that slope down are back-focus.
Turn the peg CCW to fix front-focus; turn it CW to fix back-focus.

I get access to the peg the same way as I would to do a sensor cleaning.
I lock the mirror up and I take the battery out.

RESULT

After a number of attempts (10!) I have reached AF Sensor nerdvana.

Here is the chart of my attempts:
http://home.comcast.net/~NikonD70/gif/AFAdjustTry.gif

My first adjustment was in the wrong direction and then I moved slowly toward my goal.
This adjustment is quite sensitive and I think would be much more challenging without an objective way to measure sharpness.
Note that the final set of 7 images are visually identical when viewed at 100%

Here's a sharpness chart for the final cam position from -5mm to 5mm:
http://home.comcast.net/~NikonD70/gif/AFAdjustCenter.gif

To state the obvious, I adjusted for the center AF Sensor; and the others are just along for the ride. If the AF Sensors are not all in the same plane then the off-center sensors will be out of adjustment. In that case I would imagine the camera would need Nikon service rather than self adjustment.

However, in my case things look pretty good. Here are sharpness profiles for all 5 AF sensors:
http://home.comcast.net/~NikonD70/gif/AFAdjustAll.gif

And considering that my LCD monitor might not be perfectly square to the camera I think this results is excellent.

(Looks to me to be more square left/right than up/down.)

Bill

Visit me at: http://home.comcast.net/~NikonD70

Labels: , , , ,

They may love your stuff


_DSC0129, Perhentian Island, Terengganu, Malaysia, originally uploaded by hackspot.
Perhentian Island, Terengganu, Malaysia
Taken with D40 and Sigma 30mm f/1.4 EX DC HSM lens

They may love your stuff; they may love the story. That doesn't mean they are going to interpret it the same way you want them to. ‘This is what it means to me. This is the way I want you to get it; I want you to go from A to Z in my order of things not in your order of things.’

Labels: , , , , , ,

Beachside plants (_DSC0254)

Location, Perhentian Island, Terengganu, Malaysia

Taken with D40 and Sigma 30mm f/1.4 EX DC HSM lens

Labels: , , , ,

The Reef at night (_DSC0290)

Sasman and Azimim got that room on the first floor

Perhentian Island, Terengganu, Malaysia

Taken with D40 and Sigma 30mm f/1.4 EX DC HSM lens

Labels: , , , ,

Sasman on Khalids fishing boat (_DSC0161)

Taken with D40 and Sigma 30mm f/1.4 EX DC HSM lens
Location: Perhentian Island, Terengganu, Malaysia

Labels: , , , ,

Khalids fishing boat (_DSC0165)

We sometimes call him "Datuk K"

Taken with D40 and Sigma 30mm f/1.4 EX DC HSM lens
Location: Perhentian Island, Terengganu, Malaysia

Labels: , , , ,

A splendid view for my room (_DSC0180)

Taken with D40 and Sigma 30mm f/1.4 EX DC HSM lens

Location: Perhentian Island, Terengganu, Malaysia

Labels: , , , ,

A storm is coming Part 1 (_DSC0298)

Taken with Nikon D40 and Sigma 30mm f/1.4 EX DC HSM lens

Location, Perhentian Island, Besut, Terengganu, Malaysia

Labels: , , , , ,